Schema Markup represents a commitment to presenting a new level of concept, or more broadly, marking content by search engines.
Schema Markup allows the publisher to provide concise information about the content to the search engines.
To tag our content through this we classify using XML tags.
schema.org is about standardizing and simplifying the method of adding semantic markup
Presenting the content information available in your web page in the form of rich snippets to be displayed to search engine crawls and converting the most visible such benefits
Schema markup plays a large, and perhaps extended, role in building the way SERPs are primarily designed.
Also local SEO ranking gains are now attributed to schema.org Markup.
Type of Schema Markup
You can use Schema Markup to mark any type of item. The most commonly used Schema Markup types are the following
• Creative works:
• Embedded non-text objects
• Event
• Health and medical types
• Organization
• Person
• Place,
• Product,
• Review,
• Action
Apart from this, you can choose from many other Schema Markup types according to your need. To get a complete list of Schema Markup, visit Type Hierarchy. Here you can choose from the master list of all available markup types according to your advantage.
How implement schema.Org Markup
First of all let's talk about how to use schema.Org Markup. Semantic markup is built to help wesite. This is to provide meaning and clarity about the web site and each web page.
To implement a schema, one must first consider the main points presented in it.
Prepare a list of what information of websites and web pages we want to display to search engine crawlers.
1. First determine the best descriptive entities of the content available on web pages to be classified in Schema Markup.which may be different for different page formats.
2. Create a detailed mapping of the information elements to reflect the properties of the content available on each of your pages.
3. Follow the method you would use to express schema markup to search engine crawlers.
4.Edit HTML document templates, or update CMS settings, or modify scripts to best describe how your pages are generated in schema markup.
5. Test the markup you've created to see if your syntax is accurate and whether you've modeled complex entities properly.
6. Find out how well search engines are consuming your structured data by analyzing how the data is being presented in SERPs
Let's try to know them one by one in more detail
Step 1: Mark the schema.org type
In this step, you have to decide which web pages to mark together while browsing.Browsing capacity is pretty limited as of the time of schema.org's publication, so you might be better off searching for all types of websites.During this step you might want to say "What is this page about?"and select schema.org type
Which can best describe the overall content of the page. But sometimes if the page is a product page, giving information about a number of product features and offers, this task is not so simple.
Step 2: Map schema.org properties to elements on the online page
Step 1 involves surveying and matching the various data elements displayed on the web page with the appropriate schema.org types and properties that you have chosen. This is how we can address some of the potential ambiguities in Step 1. And you can create schema.org. Markup thats not visible to human users. But it is presented to lure search engine crawls.
After completing this step you should have a complete mapping between the data displayed on the page.
The model that makes up schema.org with different types and properties can be simple or complex with multiple levels of nesting.
Step 3: Choose Your Implementation Technique
For most people this means "marking the page" when it comes to choosing your implementation technology.
But here one should choose a page which is mostly template driven with static data or you are also using content management system or publishing platform. In addition, more dynamic sites have different standards because they use complex pipelines for page creation.
Verifying that schema markup created for these types of sites is correct or can be complicated if things are not programmed correctly to put the right tags in the right places.
You must first edit the template or modify the page.
After this microdata markup has to be entered to generate the output. Through the main point we can say that the microdata markup we got in step 2 in the form of HTML can be used to get the information whether the page created by the web server is according to it or not. Apart from this, you can also verify this with the help of some tools.
Step 4 - Apply changes to generate target schema.org code-
In this step go to your pages to be served by your web server. Here you have to modify the system, update the template, modify the page production program or we can say to do the content management.
Step 5 - Testing
This is the last step in implementing the schema markup. At this stage the web server will be shooting bundles of HTML with micro meta tags embedded in it that add meaning and structure to your data.
The schema markup code generated here must be syntactically correct and express the correct model.
The structure of the properties and types of information displayed on our pages must be accurately modeled into larger properties and types.
You should check the schema markup code to make sure all the data is there, nested properly.
You can verify schema.org microdata markup using some tools.
We think it is best to use Google's Structured Data Testing Tool.
Latest create Schema markup help with Google’s Structured Data Markup Helper
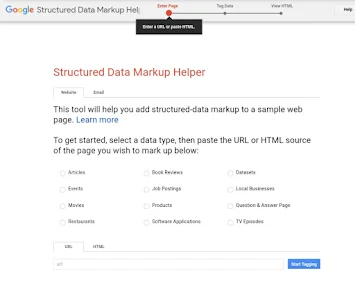
1.Open Google’s Structured Data Markup Helper
2. Select the Type of Data and paste URL for generat markup
Here you get to see many listed options. Which you can use according to you. We will create the schema markup here using "article". And paste the url of page or website whose markup you want to generate. And Then, click “Start Tagging.”
Read itfor know:- How check your Website loading Time Using Free 7 Tools
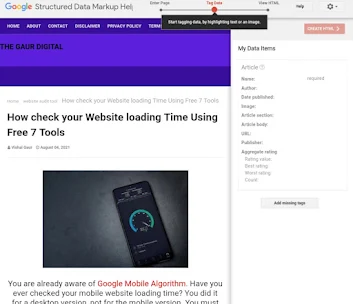
As soon as you click on start tagging your page will start loading in markup tool and will start tagging the item.
3. Select the Elements to Mark Up
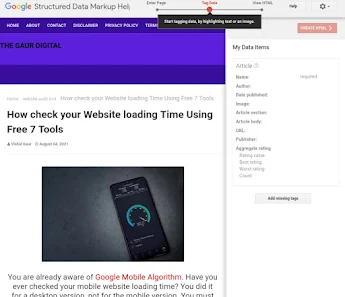
Since this piece of content is a piece of writing, I’m getting to highlight the name of the article so as to feature “Name” markup. When I finish highlighting, I select “Name” from the tooltip.Similarly other items are also to be added to the markup list.
4. Create HTML
After you've added your items to the markup list, you'll need to generate the html. Click "Create HTML".
5. Add Schema Markup to Your Site
Now the html file that you generated will have to be added with your post. For this download the HTML file, and copy/paste it into your CMS or ASCII text file .
6. Test Schema markup
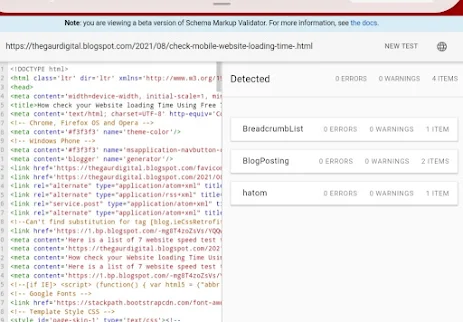
Now we will check using the Structured Data Testing Tool that there is no error in the schema markup prepared by us. For this you have to open the Structured Data Testing Tool and going to Schema Markup Validator.
After pasting your URL in the testing window, you have to click on RUN TEST, after that in the result which will be shown, we can see that there is no error in our html file. If any error is coming then you will be able to correct it.
That's all you generat your page schema markup .
Conclusion
Schema markup is an SEO technique that works to create relevant microdata to improve our search results. So we should always use it to our advantage. In the above article you must have come to know what is schema markup and how to generate it. So now you can take advantage of it by implementing it on your website.
How check your Website loading Time Using Free 7 Tools


